【Swift】Sign in with Appleの実装方法!Apple IDを使ったログイン機能

この記事からわかること
- Sign in with Appleとは?
- Apple IDを使ったログイン認証機能の実装方法
- AuthenticationServicesフレームワークの使い方
- インターフェースをStoryboardで構築している場合の実装方法
index
[open]
- Sign in with Appleとは?
- アプリにログイン機能を組み込むなら必須
- Swiftでログインボタンを実装する方法
- Developer siteでSign in with Appleを有効にする
- Xcode側でSign in with Appleを追加
- AuthenticationServicesフレームワーク
- UIKit(Storyboard)での実装方法
- ASAuthorizationAppleIDButtonクラスでボタンを実装
- ボタンのデザインを変更する
- ASAuthorizationAppleIDButton.ButtonType
- ASAuthorizationAppleIDButton.Style
- ASAuthorizationAppleIDProviderクラスで承認リクエストの構築
- presentationAnchorメソッド
- ログイン承認状態の識別
- 全体のコード
\ アプリをリリースしました /
iOSやAndroidなどさまざまなアプリにApple IDを使用してログインできる「Sign in with Apple」とはどのようなものなのか、またSwiftでの実装方法をまとめていきます。
Sign in with Appleとは?
Sign in with AppleとはAppleが公式に提供しているログイン認証機能のことです。自分のApple IDを使用してWebサイトやモバイルアプリにサインインするための機能を提供してくれます。
Apple IDをそのまま使用できることにより指紋認証(Touch ID)や顔認証(Face ID)などを使った認証が行えたり、Apple IDに紐づいているメールアドレスをアプリに対して非公開に設定することができるようになっています。
アプリにログイン機能を組み込むなら必須
アプリに対してサードパーティ製(外部サービス)のログイン機能やSNSサービス(GoogleやTwitterなど)を使用する場合はApple IDでのサインインを実装することが必須であるとガイドラインに明記されるようになりました。
”4.8 Sign in with Apple
Apps that use a third-party or social login service (such as Facebook Login, Google Sign-In, Sign in with Twitter, Sign In with LinkedIn, Login with Amazon, or WeChat Login) to set up or authenticate the user’s primary account with the app must also offer Sign in with Apple as an equivalent option. A user’s primary account is the account they establish with your app for the purposes of identifying themselves, signing in, and accessing your features and associated services.”
私も知らずにGoogleアカウントのログインのみを実装したアプリを申請を出したところ以下のような内容でリジェクトされてしまいました。
”Guideline 4.8 - Design - Sign in with Apple
Your app uses a third-party login service, but does not offer Sign in with Apple. Apps that use a third-party login service for account authentication need to offer Sign in with Apple to users as an equivalent option.
Next Steps
Please revise your app to offer Sign in with Apple as an equivalent option for account authentication.”
Swiftでログインボタンを実装する方法
ここからはインターフェースをStoryboardで構築している場合の実装方法を解説していきます。
- Developer siteでSign in with Appleを有効にする
- Xcode側でSign in with Appleを追加
- AuthenticationServicesフレームワークを使って実装
Developer siteでSign in with Appleを有効にする
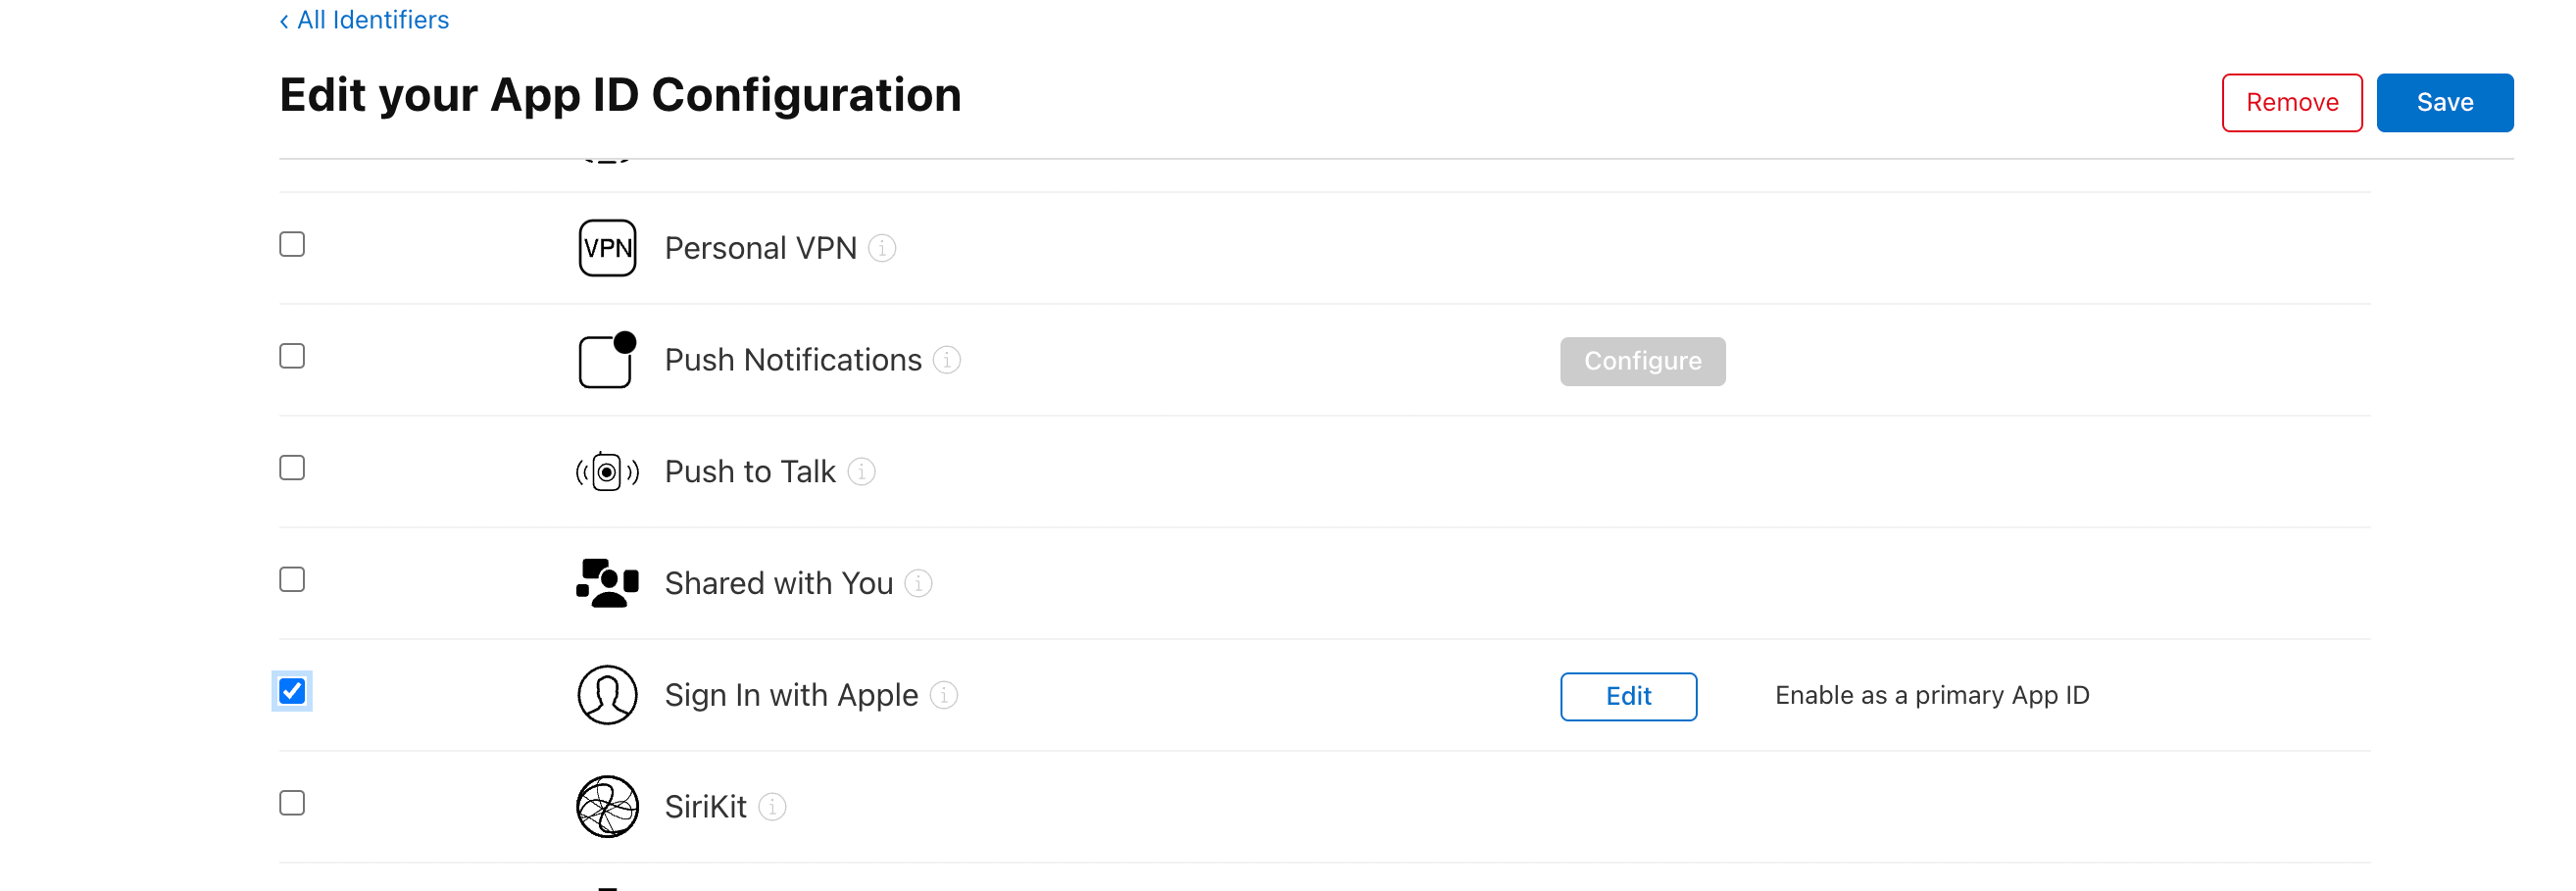
まずは「Apple Developer site」にアクセスして使用したいApp IDでSign in with Appleを有効にして作成しておきます。既に生成済みであれば「Certificates, IDs & Profiles」から対象のApp IDを編集していきます。
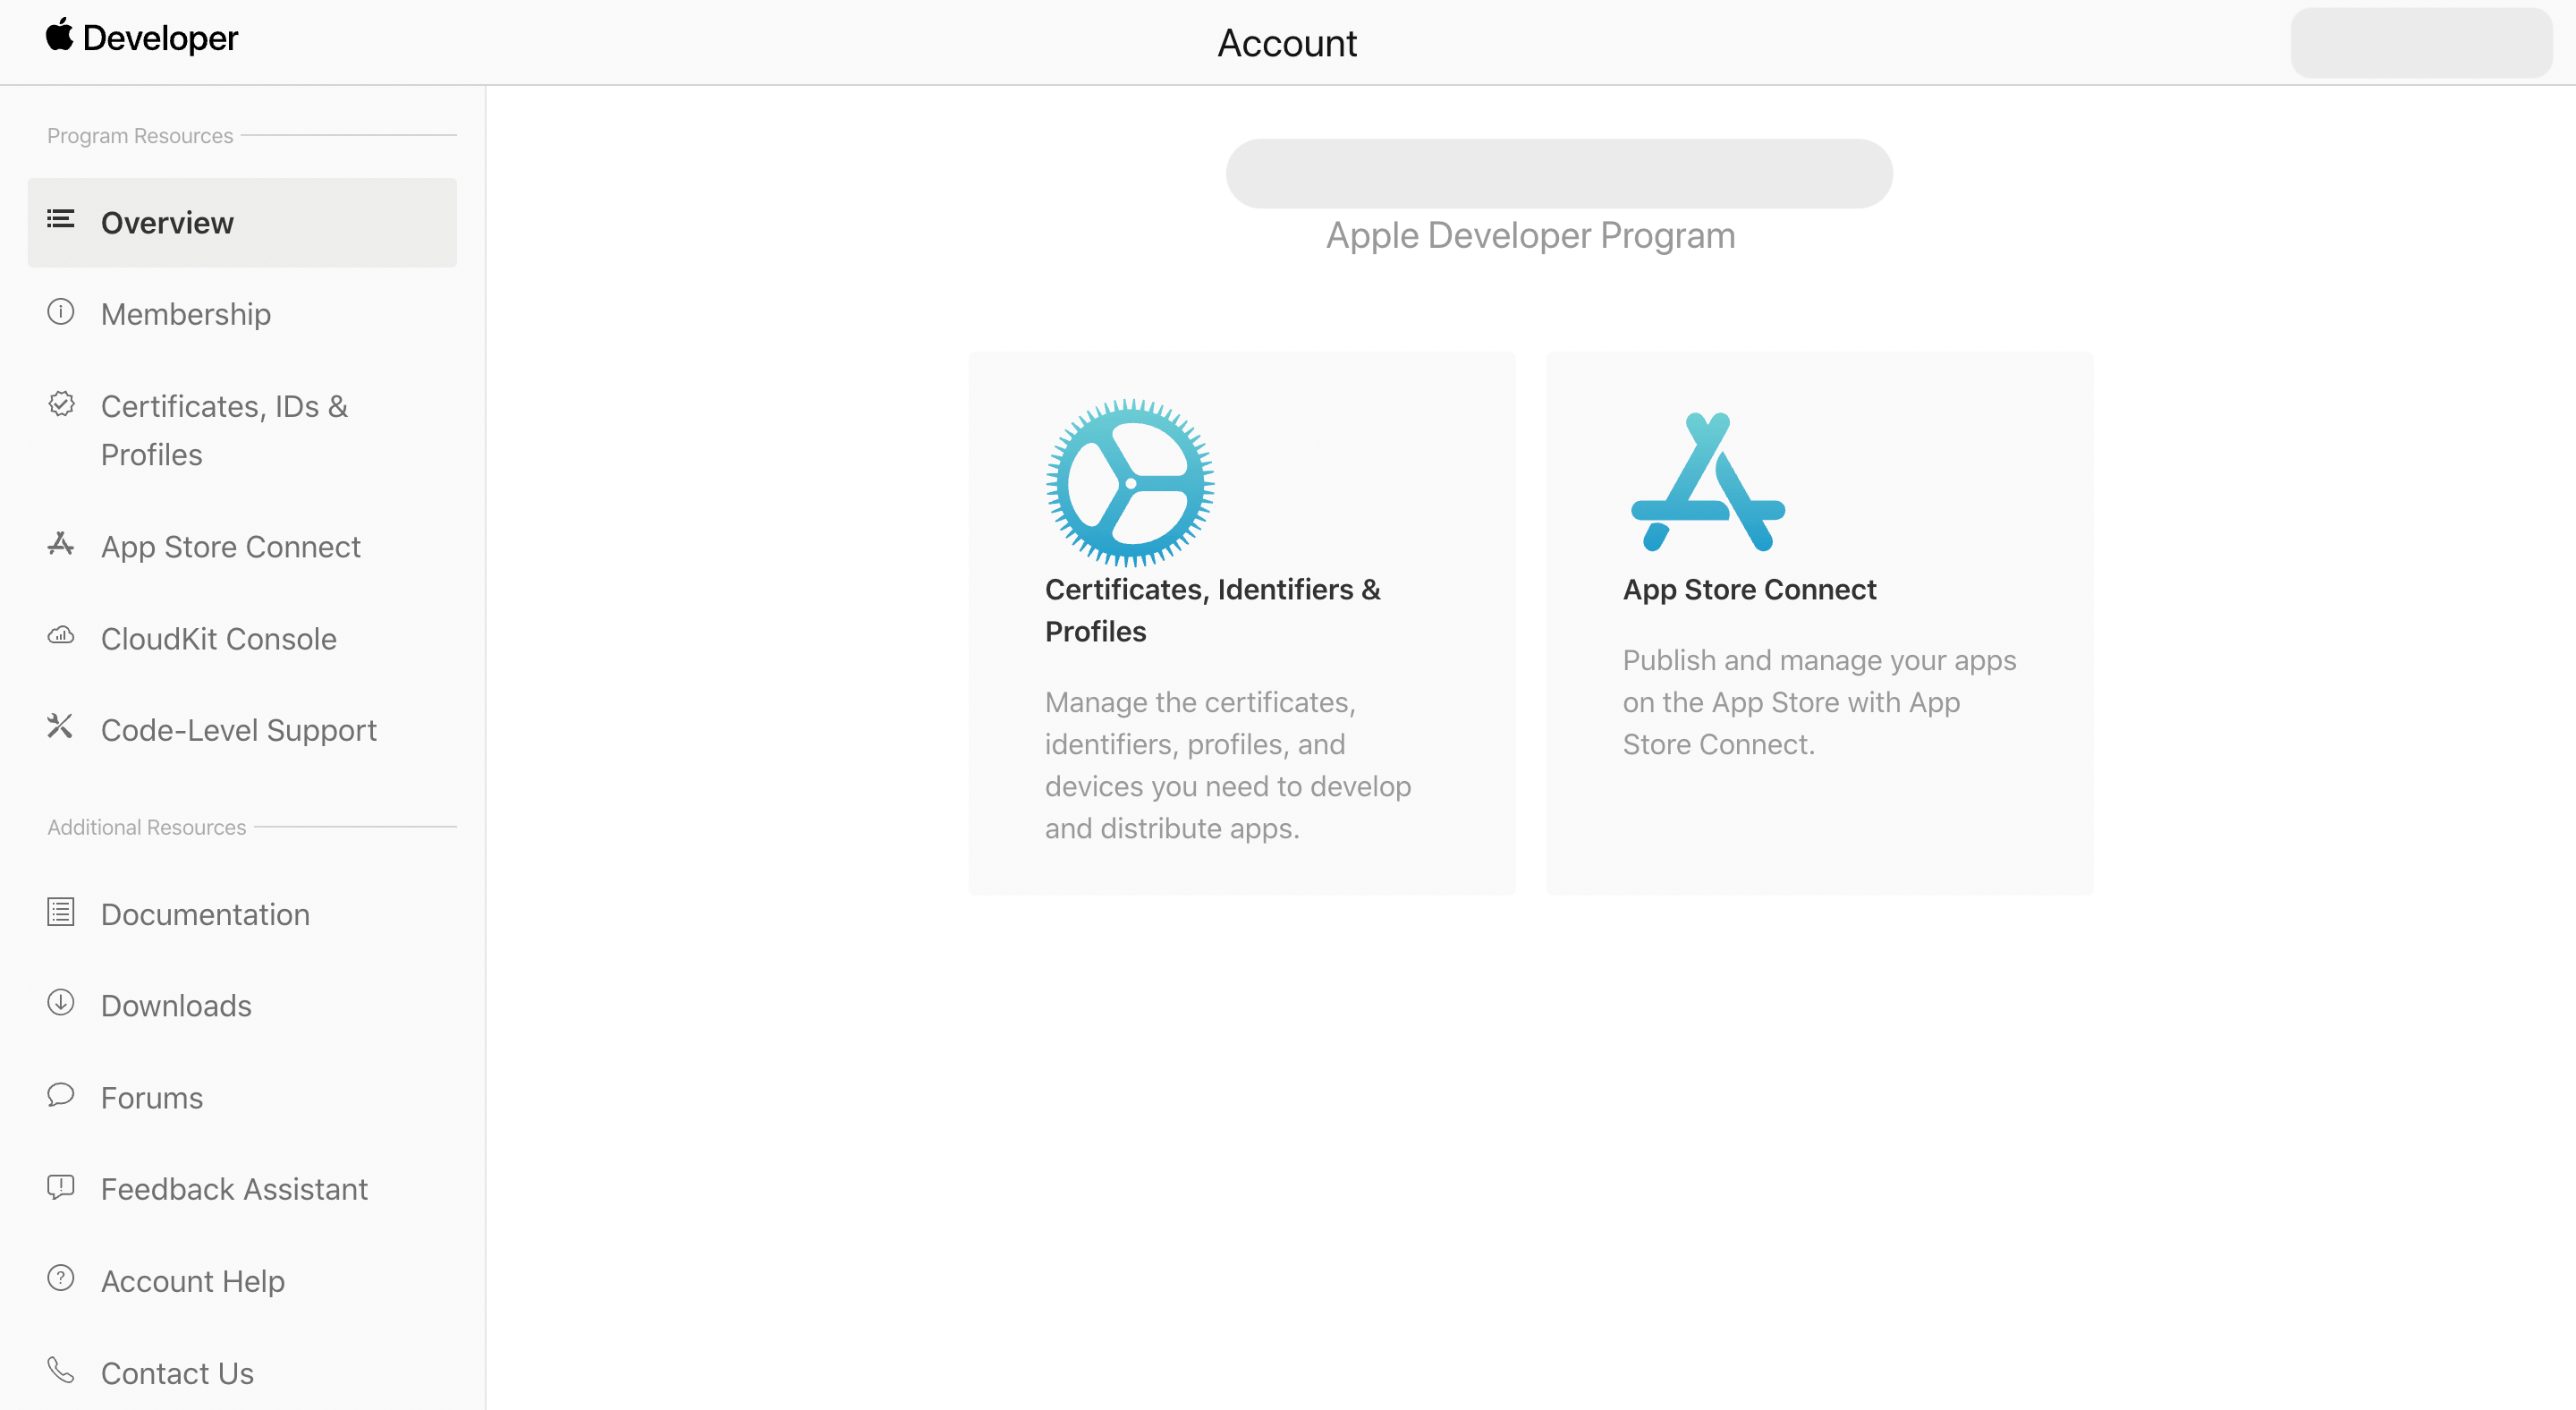
有効にするにはチェックを入れるだけです。
Xcode側でSign in with Appleを追加
続いてXcode側で「Signing & Capability」タブの 「 + 」ボタンをクリックして「Sign in with Apple」を追加します。

これでXcode側の作業も完了です。
AuthenticationServicesフレームワーク
Sign in with Appleの実装はAuthenticationServicesフレームワークとして提供されています。Xcodeの中にはすでに組み込まれているのでimport文を記述することで使用することができます。
UIKit(Storyboard)での実装方法
実装手順は公式の方法に倣いつつ、すぐにテストできるようにところどころ改変しながら記述していきます。
参考文献:Implementing User Authentication with Sign in with Apple
- ASAuthorizationAppleIDButtonクラスでボタンを実装
- ASAuthorizationAppleIDProviderクラスで承認リクエストの構築
- ログイン承認状態の識別
Sign in with AppleではログインボタンのUIがあらかじめ用意されています。見た目を変更することも可能ですが他のアプリと共通の見た目になるのでそのまま使うことが推奨されています。

ASAuthorizationAppleIDButtonクラスでボタンを実装
ボタンを実装するためにStoryboardにビューを追加しておきます。ここで追加するのはUIButtonではなくUIViewです。
追加したUIViewをViewControllerクラスのプロパティに紐付けておきます。続いてコードを記述していきます。
基礎となるボタンビューはASAuthorizationAppleIDButtonクラスとして定義されています。インスタンス化してメソッドを紐づけるのは通常のボタン(UIButton)と同じ流れです。
定義したメソッドをviewDidLoad内で呼び出すようにしておきます。
ボタンのデザインを変更する
参考文献:ASAuthorizationAppleIDButton
ASAuthorizationAppleIDButtonクラスではインスタンス化時に用意されたデザイン(スタイルとタイプ)を指定できます。
ASAuthorizationAppleIDButton.ButtonType
ボタンのタイプはASAuthorizationAppleIDButton.ButtonTypeの値で指定します。
ASAuthorizationAppleIDButton.Style
ボタンのスタイルはASAuthorizationAppleIDButton.Styleの値で指定します。
ASAuthorizationAppleIDProviderクラスで承認リクエストの構築
ボタンに紐づけるアクションはAppleに対して承認をリクエストする処理です。ASAuthorizationAppleIDProviderクラスでリクエストを構築しASAuthorizationControllerクラスを使って認証フローを実行します。
このアクションメソッドを定義した段階ではエラーが出ますが次のコードを記述して解決できます。
presentationAnchorメソッド
参考文献:ASAuthorizationControllerPresentationContextProvidingプロトコルpresentationAnchorメソッド
認証フローはそのためにViewControllerクラスを拡張して ASAuthorizationControllerPresentationContextProvidingのpresentationAnchorを使ってモーダルでユーザーに提示します。
ログイン承認状態の識別
ログイン状態を識別するためにはAuthViewControllerクラスをさらに拡張させASAuthorizationControllerDelegateに準拠させます。用意されているデリゲードメソッドから承認状態やエラーなどを操作することができます。
これでApple IDでサインインすることができるようになりました。Xcodeのバージョンが古いから(?)なのかシミュレーターではサインインできずにずっとぐるぐるしていたので実機へビルドするとテストすることができるようになります。
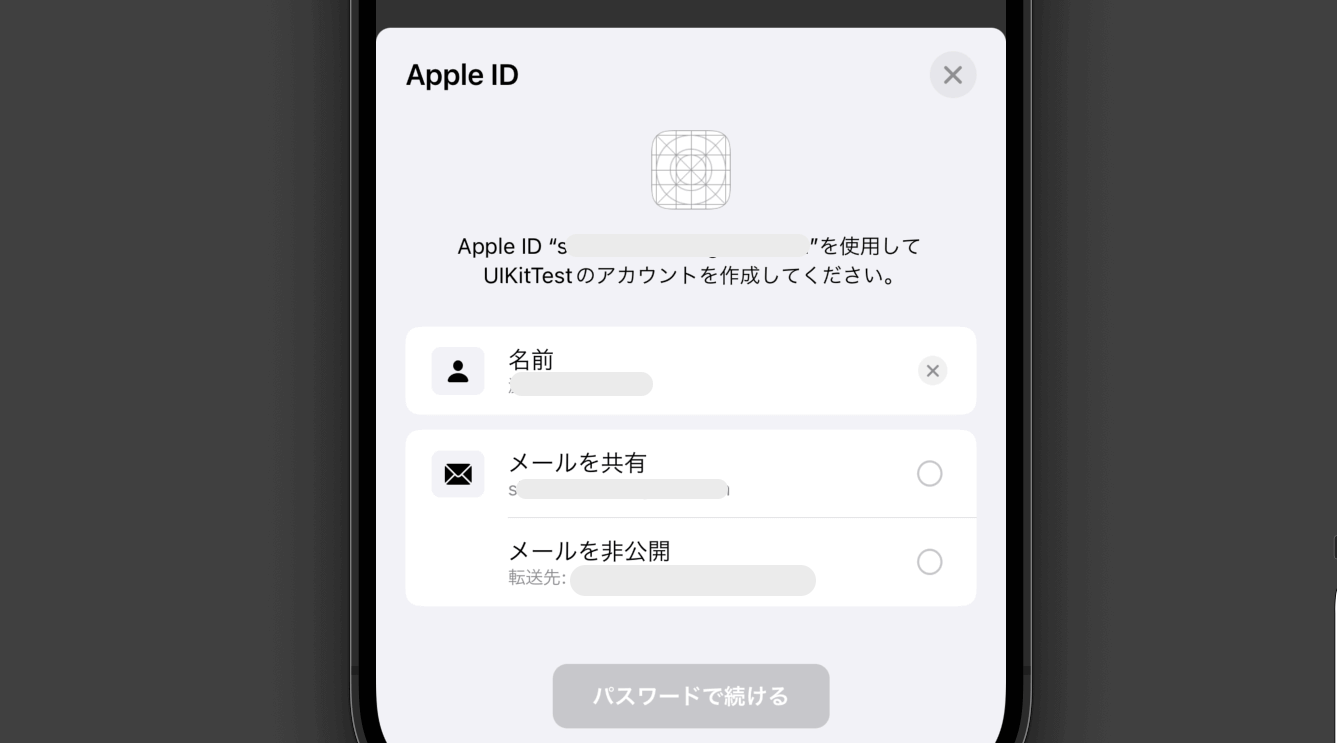
また最新のXcodeのバージョンに更新した後ならシミュレーターでも正常に動作を確認することができました。
おすすめ記事:エラー:Sign in with Appleで「登録が完了しませんでした」の解決方法!
全体のコード
まだまだ勉強中ですので間違っている点や至らぬ点がありましたら教えていただけると助かります。
ご覧いただきありがとうございました。


