【Swift UI/AVFoundation】カメラアプリを開発する方法!撮影と保存
この記事からわかること
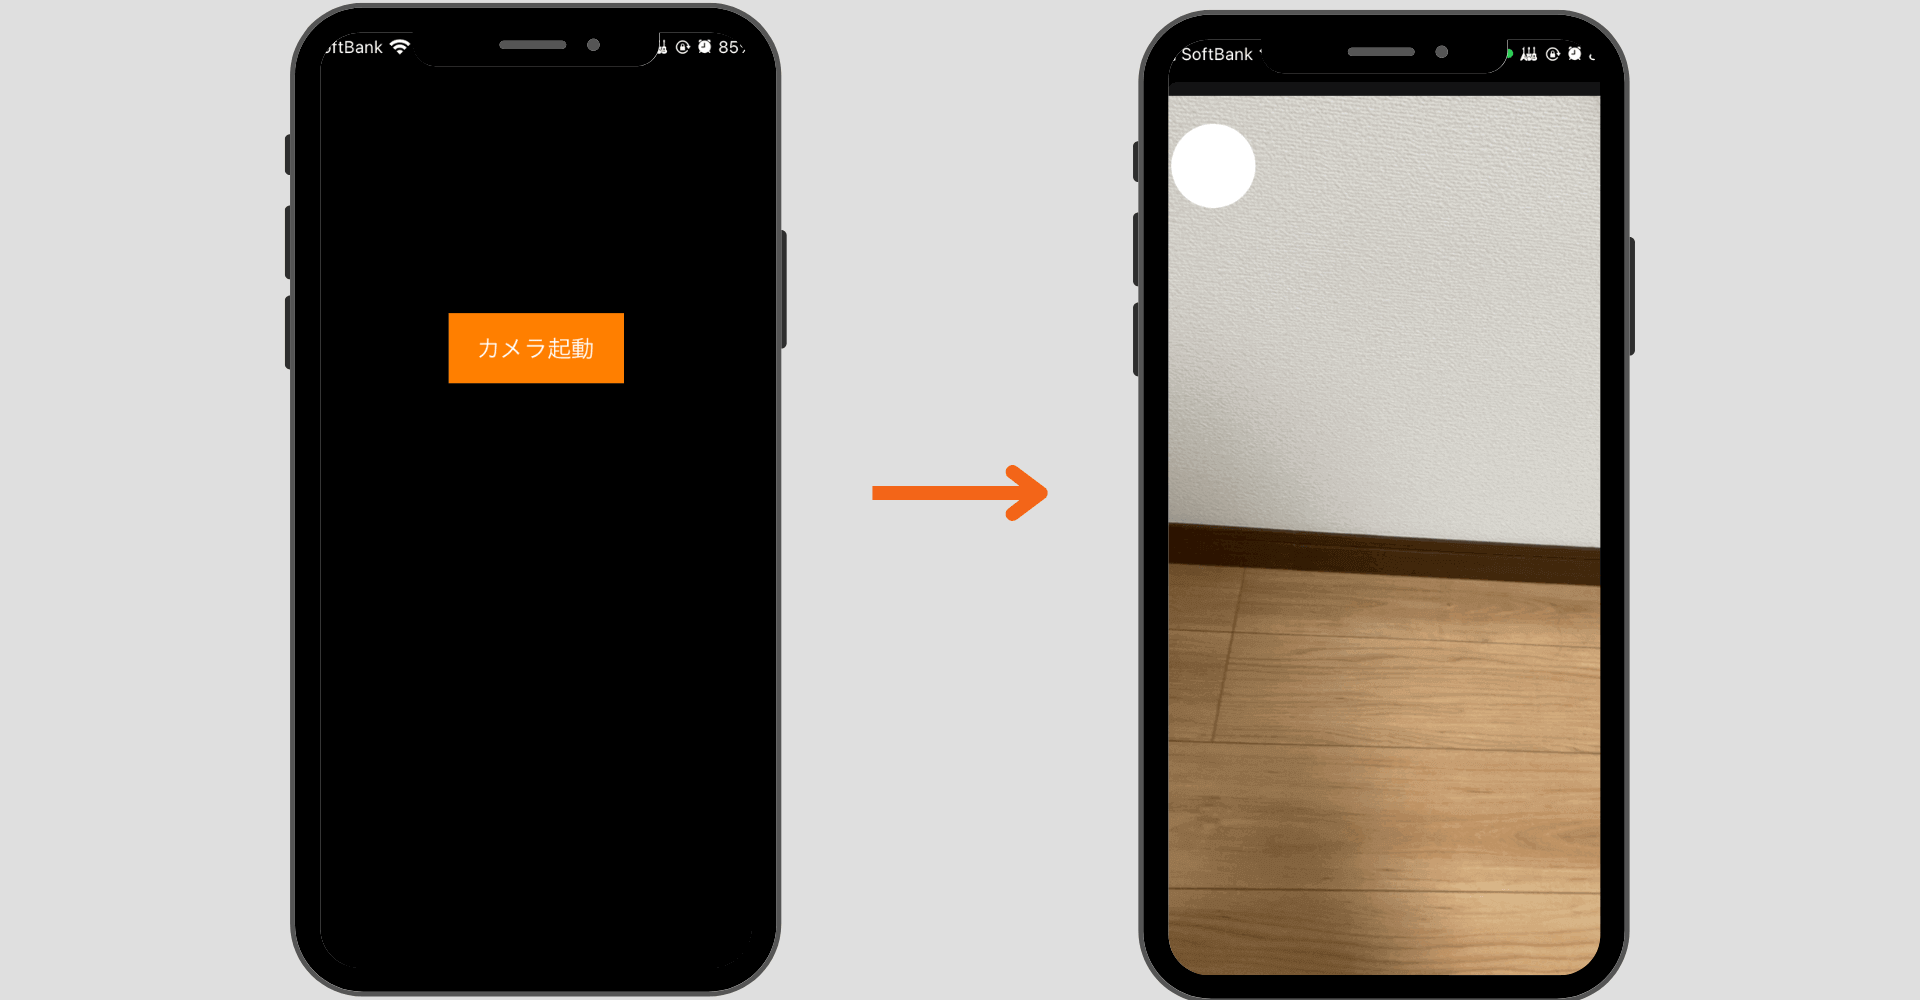
- Swift UIでカメラアプリの実装方法
- AVFoundationの使い方や特徴
- カスタマイズできるカメラビューの作り方
index
[open]
\ アプリをリリースしました /
友達や家族の誕生日をメモ!通知も届く-みんなの誕生日-
posted withアプリーチ
環境
- Xcode:15.0.1
- iOS:17.0
- Swift:5.9
- macOS:Sonoma 14.1
Swift UIでカメラアプリを実装したい場合はUIImagePickerController
をSwift UIで表示できるようにしたり、AVFoundation
を駆使して実装する必要があります。今回はAVFoundation
を使用してSwift UIでカメラアプリを作ってみたいと思います。
AVFoundationとは?
AVFoundation
は実装するのはなかなか手間がかかりますがカスタマイズ性が高く柔軟なカメラアプリを開発することができるフレームワークで、撮影ボタンの位置やデザイン、カメラビューのサイズなどを好きなように配置できるので独自のカメラアプリを作成するのにおすすめです。
AVFoundationの基本的な使い方はUIKitでの実装方法とともに以下の記事で紹介しているので今回はSwift UIで実装する方法をまとめていきます。
Swift UIでAVFoundationを使用する方法
Swift UIでAVFoundation
を使用するためには以下の3ファイルを用意します。ファイルの構成のアドバイスがあればお願いします。
作成するファイル
- Viewファイル
- ViewModelファイル
- Repositoryファイル
全体像はGitHubに上げているので参考にしてください。
おすすめ記事:GitHub-MyCameraApp
Repositoryファイル
import SwiftUI
import AVFoundation
import Combine
class CameraFunctionRepository: NSObject, AVCapturePhotoCaptureDelegate, AVCaptureMetadataOutputObjectsDelegate {
/// 撮影された写真
public var image: AnyPublisher<UIImage, Never> {
_image.eraseToAnyPublisher()
}
private let _image = PassthroughSubject<UIImage, Never>()
/// 撮影プレビュー領域
public var previewLayer: AnyPublisher<CALayer, Never> {
_previewLayer.eraseToAnyPublisher()
}
private let _previewLayer = PassthroughSubject<CALayer, Never>()
/// 撮影デバイス
private var capturepDevice: AVCaptureDevice!
private var avSession: AVCaptureSession = AVCaptureSession()
private var avInput: AVCaptureDeviceInput!
private var avOutput: AVCapturePhotoOutput!
}
extension CameraFunctionRepository {
/// 初期準備
public func prepareSetting() {
setUpDevice()
beginSession()
}
/// 写真撮影
public func takePhoto() {
let settings = AVCapturePhotoSettings()
settings.flashMode = .auto
settings.isHighResolutionPhotoEnabled = false
// settings.maxPhotoDimensions = CGSize(width: desiredWidth, height: desiredHeight)
self.avOutput?.capturePhoto(with: settings, delegate: self)
}
/// セッション開始
public func startSession() {
DispatchQueue.global(qos: .background).async { [weak self] in
guard let self else { return }
if self.avSession.isRunning { return }
self.avSession.startRunning()
}
}
/// セッション終了
public func endSession() {
if !avSession.isRunning { return }
avSession.stopRunning()
}
}
extension CameraFunctionRepository {
// 使用するデバイスを取得
private func setUpDevice() {
avSession.sessionPreset = .photo
guard let device = AVCaptureDevice.default(for: .video) else { return }
capturepDevice = device
// if let availableDevice = AVCaptureDevice.DiscoverySession(
// deviceTypes: [.builtInWideAngleCamera],
// mediaType: AVMediaType.video,
// position: .back).devices.first {
// capturepDevice = availableDevice
// }
}
// セッションの開始
private func beginSession() {
self.avSession = AVCaptureSession()
guard let videoDevice = AVCaptureDevice.default(for: .video) else { return }
do {
let deviceInput = try AVCaptureDeviceInput(device: videoDevice)
if self.avSession.canAddInput(deviceInput) {
self.avSession.addInput(deviceInput)
self.avInput = deviceInput
let photoOutput = AVCapturePhotoOutput()
if self.avSession.canAddOutput(photoOutput) {
self.avSession.addOutput(photoOutput)
self.avOutput = photoOutput
let previewLayer = AVCaptureVideoPreviewLayer(session: self.avSession)
previewLayer.videoGravity = .resize
self._previewLayer.send(previewLayer)
self.avSession.sessionPreset = AVCaptureSession.Preset.photo
}
}
} catch {
print(error.localizedDescription)
}
}
// デリゲートメソッド
func photoOutput(_ output: AVCapturePhotoOutput,
didFinishProcessingPhoto photo: AVCapturePhoto, error: Error?) {
if let imageData = photo.fileDataRepresentation() {
_image.send(UIImage(data: imageData)!)
}
}
}
// カメラプレビュー
struct CALayerView: UIViewControllerRepresentable {
var caLayer: CALayer
func makeUIViewController(context: UIViewControllerRepresentableContext<CALayerView>) -> UIViewController {
let viewController = UIViewController()
// プレビューの大きさを指定 iPhoneのカメラは4:3なのでそれに合わせる
/// `previewLayer.videoGravity = .resize` を指定することでレイヤーいっぱいに合わせる
caLayer.frame = CGRect(x: 0, y: 0, width: DeviceSizeManager.deviceWidth, height: (4 / 3) * DeviceSizeManager.deviceWidth)
viewController.view.layer.addSublayer(caLayer)
return viewController
}
func updateUIViewController(_ uiViewController: UIViewController, context: UIViewControllerRepresentableContext<CALayerView>) {
// プレビューの大きさを指定 iPhoneのカメラは4:3なのでそれに合わせる
/// `previewLayer.videoGravity = .resize` を指定することでレイヤーいっぱいに合わせる
caLayer.frame = CGRect(x: 0, y: 0, width: DeviceSizeManager.deviceWidth, height: (4 / 3) * DeviceSizeManager.deviceWidth)
}
}
ViewModelファイル
import UIKit
import Combine
class CameraFunctionViewModel: ObservableObject {
// MARK: - Model
@Published var image: UIImage?
@Published var previewLayer: CALayer?
// MARK: - Repository
private var cameraRepository = CameraFunctionRepository()
// MARK: - Combine
private var cancellables:Set<AnyCancellable> = Set()
init() {
cameraRepository.image.sink { [weak self] image in
guard let self else { return }
self.image = image
}.store(in: &cancellables)
cameraRepository.previewLayer.sink { [weak self] previewLayer in
guard let self else { return }
self.previewLayer = previewLayer
}.store(in: &cancellables)
cameraRepository.prepareSetting()
}
}
// MARK: - カメラ機能
extension CameraFunctionViewModel {
/// 写真撮影
public func takePhoto() {
cameraRepository.takePhoto()
}
/// セッション開始
public func startSession() {
cameraRepository.startSession()
}
/// セッション終了
public func endSession() {
cameraRepository.endSession()
}
}
Viewファイル
import SwiftUI
struct CameraFunctionView: View {
@ObservedObject private var viewModel = CameraFunctionViewModel()
var body: some View {
VStack(spacing: 0) {
if let image = viewModel.image {
Image(uiImage: image)
.resizable()
.frame(width: DeviceSizeManager.deviceWidth, height: (4 / 3) * DeviceSizeManager.deviceWidth)
Spacer()
HStack {
Button(action: {
self.viewModel.image = nil
}) {
Image(systemName: "trash")
.resizable()
.scaledToFit()
.frame(width: 20)
.foregroundStyle(.white)
}.frame(width: 40)
.padding(.leading, 20)
Spacer()
Button(action: {
// TODO: 保存処理など
}) {
Image(systemName: "checkmark")
.resizable()
.foregroundStyle(.white)
.frame(width: 40, height: 40)
.overlay {
RoundedRectangle(cornerRadius: 80)
.stroke(Color.white, lineWidth: 2)
.frame(width: 80, height: 80)
}.padding(.bottom, 10)
}
Spacer()
Spacer()
.frame(width: 40)
.padding(.trailing, 20)
}.padding(.bottom)
} else {
if let previewLayer = viewModel.previewLayer {
CALayerView(caLayer: previewLayer)
}
HStack {
Spacer()
Button(action: {
self.viewModel.takePhoto()
}) {
Image(systemName: "camera")
.resizable()
.foregroundStyle(.white)
.frame(width: 50, height: 40)
.overlay {
RoundedRectangle(cornerRadius: 80)
.stroke(Color.white, lineWidth: 2)
.frame(width: 80, height: 80)
}.padding(.bottom, 10)
}
Spacer()
}.padding(.bottom)
}
}.background(Color.black)
.onAppear {
self.viewModel.startSession()
}.onDisappear {
self.viewModel.endSession()
}
}
}
#Preview {
CameraFunctionView()
}
まだまだ勉強中ですので間違っている点や至らぬ点がありましたら教えていただけると助かります。
ご覧いただきありがとうございました。