【Swift UIKit】UITableViewの使い方!リストビューの実装方法

この記事からわかること
- SwiftのUIKitでリストを実装する方法
- UITableViewを使った方法
- UITableViewCellクラスとdelegateやdataSourceの意味
- セクションごとに分割する方法
- UITableViewDelegate/UITableViewDataSourceプロトコルの使い方
index
[open]
\ アプリをリリースしました /
環境
- Xcode:16.0
- iOS:18.0
- Swift:5.9
- macOS:Sonoma 14.6.1
UITableViewクラスとは?
UIKitフレームワークを使用している場合に以下のようなリスト形式のビューを構築できるのがUITableViewクラスです。複数のデータを見やすく管理するのに適しており、データ数が多くなっても画面からはみ出る分は自動でスクロールビューにしてくれるのでデータ数を意識する必要はありません。
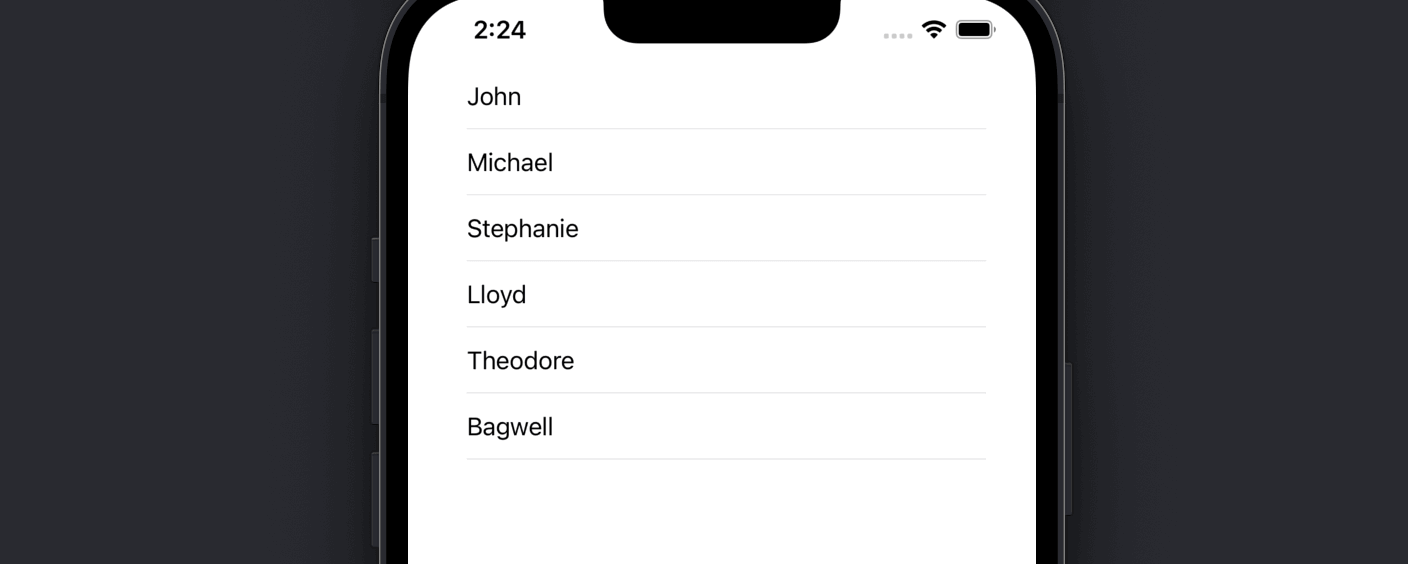
Swift UIではList構造体を使用することで表示できますが使用方法は異なります。
UITableViewを使用する上でポイント
UITableViewを使用するにあたってポイントとなるのは以下の3つです。
- UITableViewCell
- delegate
- dataSource
UITableViewCell
UIKitのリスト表示を行うUITableViewでは1行1行のことを「セル」と呼びUITableViewCellクラスとして管理されます。
delegate
delegateは処理を委任するための仕組みで、UITableViewではセルの個数やセクション数などをデリゲートメソッドとして定義します。
おすすめ記事:【Swift】delegate(デリゲート)とは?使い方とメリット
dataSource
dataSourceは実際にリスト表示するためのデータ元を指します。
リストビューの実装方法
ここからは実際にリストビューを実装していきたいと思います。そのためにはInterface Builderからの操作とコードを記述する必要があります。新規のSwiftプロジェクトを立ち上げた状態から始めていきます。
先にざっと流れを確認しておきます。この順番でなくても動作はしますので自分の中で実装までの流れを決めておくと良いかも知れません。
実装の流れ
- Main.storyboardにTable Viewを追加
- delegateとdatasourceを紐付け
- 表示させるデータの定義
- UITableViewDataSourceとUITableViewDelegateプロトコルに準拠したViewControllerクラスの作成
- セルの個数とセルを生成するメソッドの定義
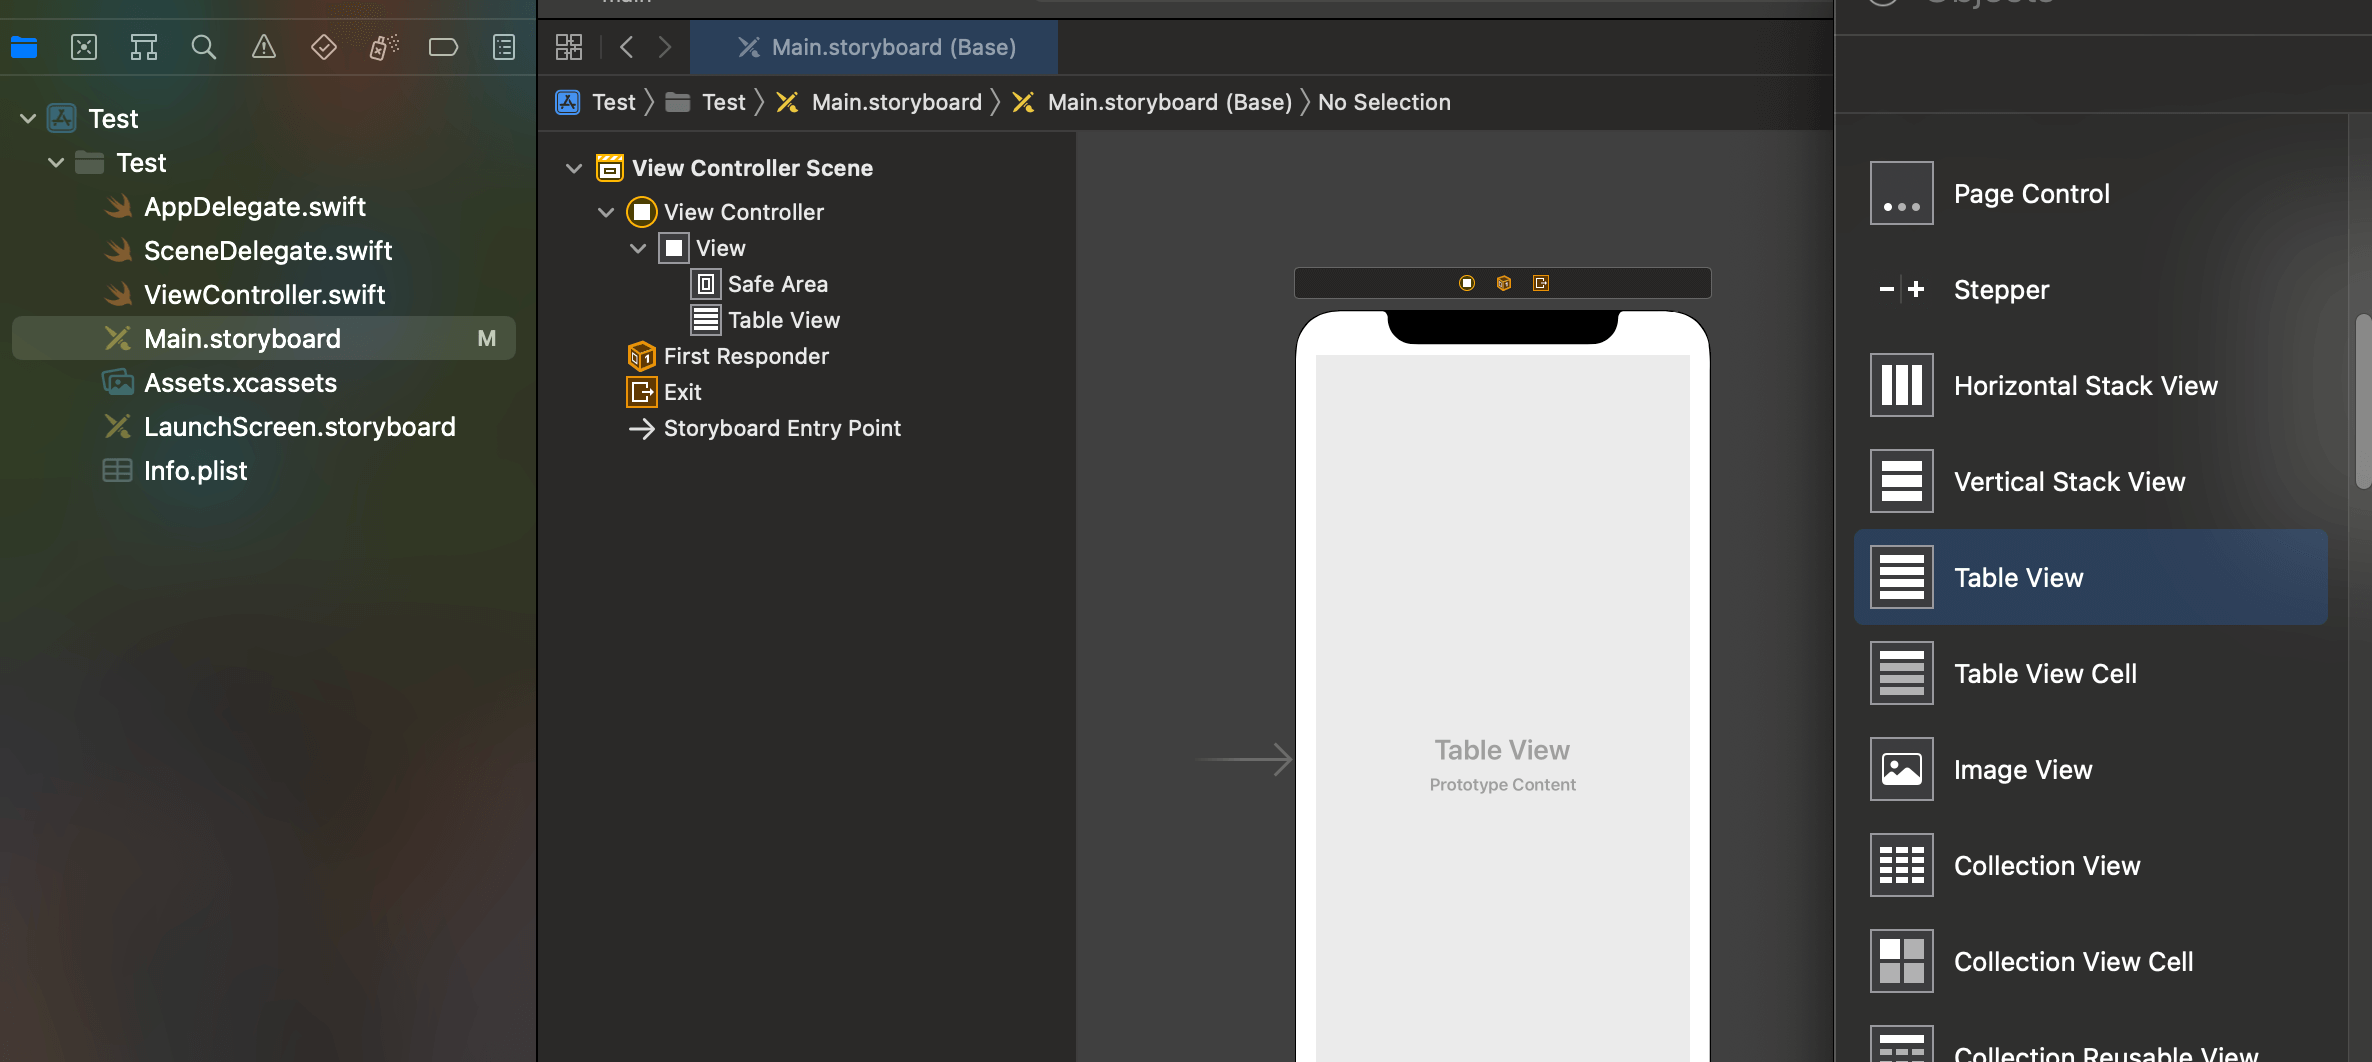
新規のプロジェクトを立ち上げたら「Main.storyboard」を開きます。するとInterface Builderが起動するので、空になっているビューに対して「Table View」を追加して画面いっぱいに広げておきます。
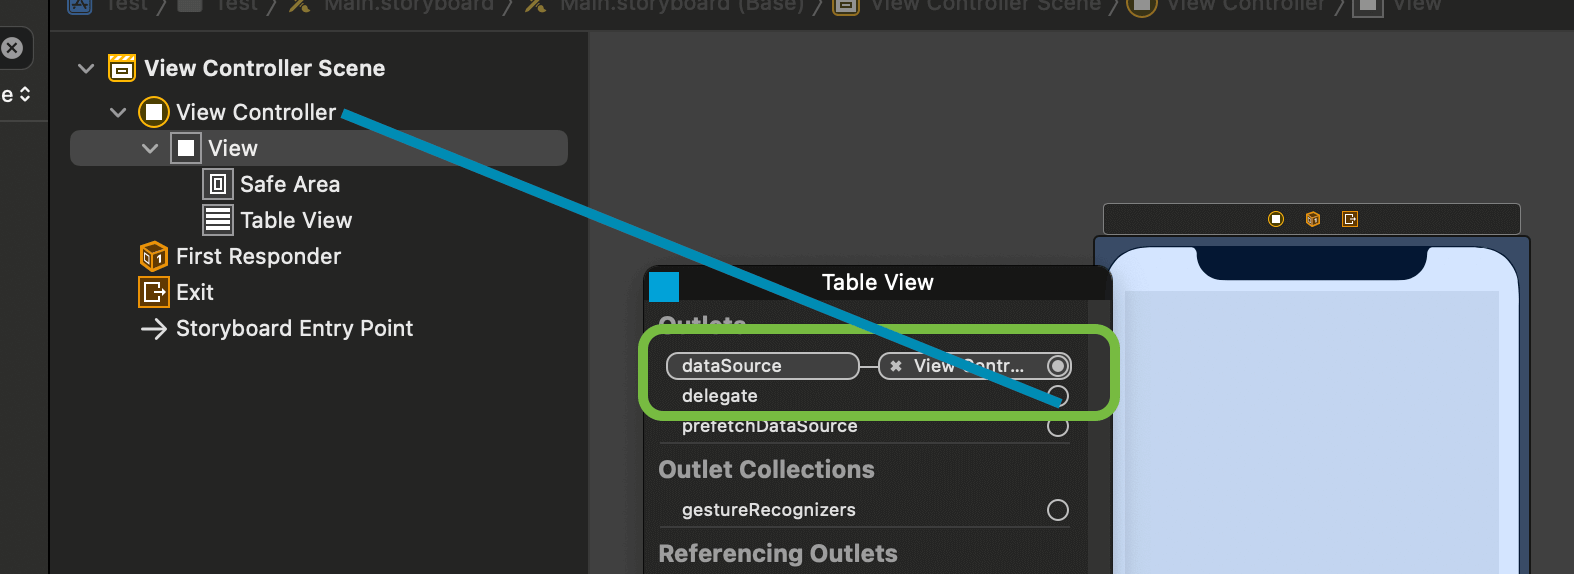
プロジェクト立ち上げ時は最初から既存のsceneと既存のViewControllerクラスが紐づいていますので特に設定は変えずにビューを右クリックします。すると以下のようなポップアップが表示されるのでdelegateとdataSourceの横からマウスで「View Controller」までつなぎます。これで既存のViewControllerクラスとTableViewとの紐付けが完了しました。
表示させるデータを定義する
続いて表示させるためのデータを定義します。今回は構造体を定義しその型のデータが複数格納された配列形式のサンプルデータを作成しておきました。
ViewControllerを調整する
既存のViewControllerクラスにUITableViewDataSourceとUITableViewDelegateプロトコルの追加とサンプルデータの読み込みをしておきます。UITableViewDataSourceプロトコルを追加したことでセルの個数を返すメソッド(numberOfRowsInSection)とセル自体を返すメソッド(cellForRowAt)を定義する必要があります。
セルの生成には独自でUITableViewCellクラスを定義すればカスタマイズしやすいセルビューを構築することも可能です。詳細は以下の記事をご覧ください。
おすすめ記事:【Swift UIKit】UITableViewCellでカスタムセルビューの作り方!
これでUIKitでリスト表示ができるようになりました。シミュレーターで確認して見てください。

UITableViewCellの使い方
UITableViewCellクラスを使用してリストのセル単位のビューを構築します。イニシャライザを使用することでセルのスタイルと識別子を設定しています。
UITableViewDelegateプロトコル
公式リファレンス:UITableViewDelegateプロトコル
UITableViewDelegateは選択の管理やセクションのヘッダーとフッターの設定、セルの削除や並べ替えなどのデリゲートメソッドを提供するプロトコルです。
デリゲートメソッド名は基本的にtableViewですが引数に渡す値が異なります。また必ず定義しないといけないメソッドはありません。
| メソッド | 概要 |
|---|---|
| tableView(_ tableView: UITableView, heightForRowAt indexPath: IndexPath) -> CGFloat | セルの高さを設定 |
| tableView(_ tableView: UITableView, heightForHeaderInSection section: Int) -> CGFloat | ヘッダーの高さを設定 |
| tableView(_ tableView: UITableView, viewForHeaderInSection section: Int) -> UIView? | ヘッダーのビューを設定 |
| tableView(_ tableView: UITableView, didSelectRowAt indexPath: IndexPath) | セルが選択された時に処理を実行 |
UITableViewDataSourceプロトコル
公式リファレンス:UITableViewDataSourceプロトコル
UITableViewDataSourceはリスト表示させるためのデータとセルを管理するためのデリゲートメソッドを提供するためのプロトコルです。
こちらも同様にデリゲートメソッド名は基本的にtableViewですが引数に渡す値が異なります。セルの数とセル自体を返すメソッドは必ず定義する必要があります。
| メソッド | 概要 |
|---|---|
| tableView(_ tableView: UITableView, numberOfRowsInSection section: Int) -> Int | セルの数を設定 |
| tableView(_ tableView: UITableView, cellForRowAt indexPath: IndexPath) -> UITableViewCell | セル自体を返す |
| numberOfSections(in tableView: UITableView) -> Int | セクションの数を設定 |
セクションごとに分割する
リスト表示しているデータをセクションごとに分割してタイトル(ヘッダー)をつけることも可能です。
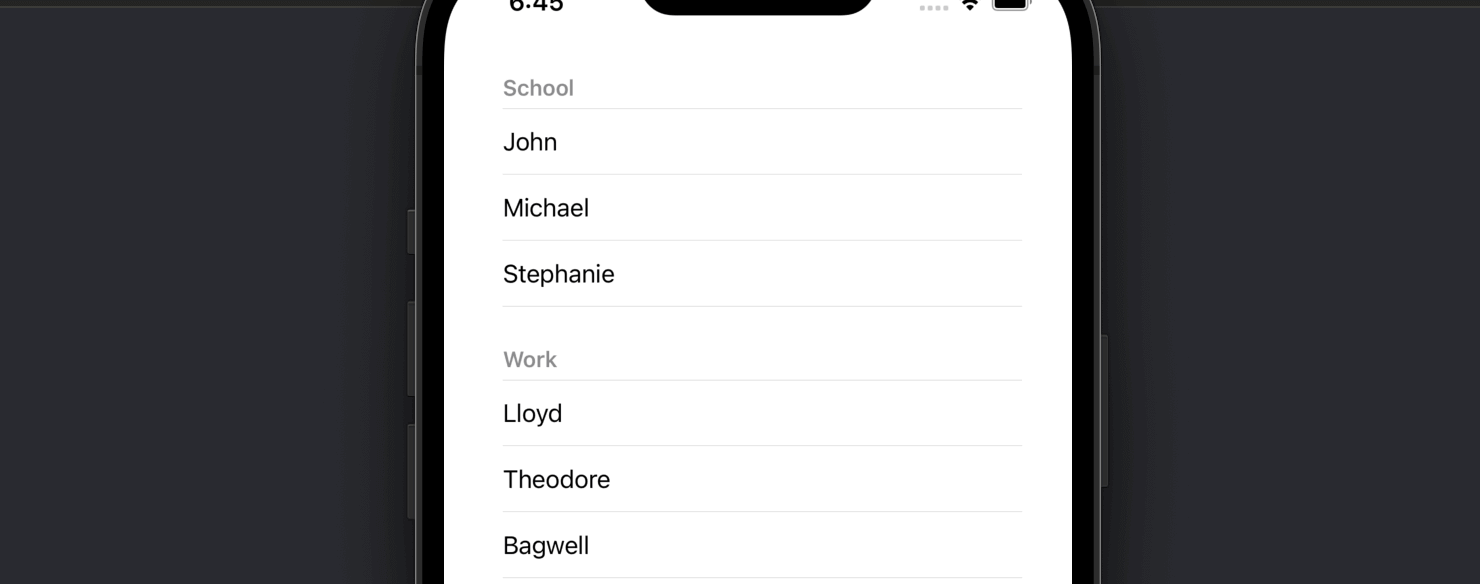
まずは表示させるデータを配列から多次元配列に変更し、表示させるセクションタイトル用のデータを配列で準備しておきます。
続いてデータの読み込みと生成するセルの修正、セクションの数を返す関数(numberOfSections)とセクションタイトルを返す関数(titleForHeaderInSection)を定義します。
セルやセクションの一部だけを更新する
セルに何かしらの更新が会った際にテーブル全体をリフレッシュするのではなくセルやセクション単位でリフレッシュさせることで冗長な再描画を防ぐことができます。
更新する際はデータの変更を行った後にbeginUpdatesメソッドを呼び出して更新を開始したことを伝えreloadSections/reloadRowsで更新し、endUpdatesで更新を終了します。
おすすめ記事
【Swift UIKit】NavigationControllerの使い方!遷移先にデータを渡す方法
まだまだ勉強中ですので間違っている点や至らぬ点がありましたら教えていただけると助かります。
ご覧いただきありがとうございました。


